Breadcrumbs show a visitor’s location within your store hierarchy and help search engines understand how your products are organized. On Shopify, the native breadcrumb structure is limited, especially on product pages, which creates both SEO and navigation issues.
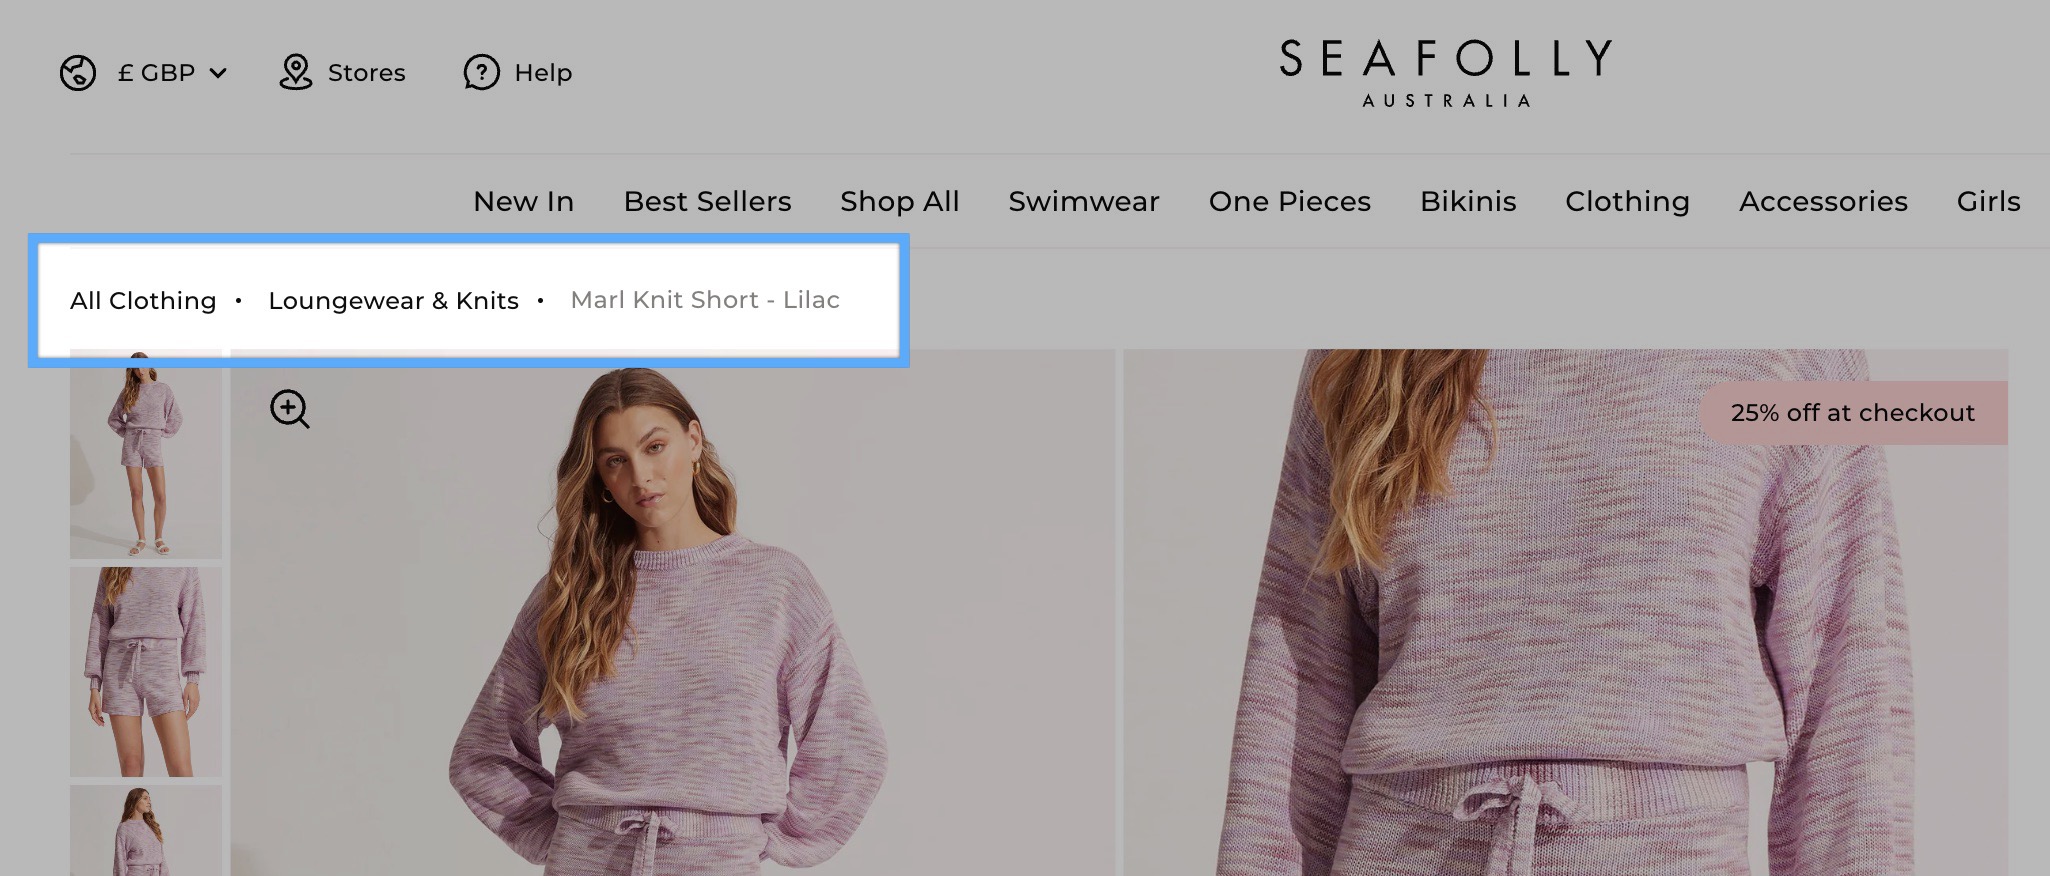
Risify solves these gaps by generating a consistent, Google-readable breadcrumb trail on every product and collection page.
Note: Breadcrumbs are managed under the Navigation tab in Risify, alongside the Similar and Discover features.
👉 Curious how Risify Breadcrumbs can help your store? Browse how Risify Breadcrumbs work to get the most value from it.
Shopify Default vs Risify Breadcrumb Comparison
|
Shopify Default Shortfall |
Risify Solution |
|---|---|
|
Breadcrumbs only appear when a user arrives through a collection URL |
Breadcrumbs always display, regardless of how the page is accessed |
|
Google cannot reliably read Shopify’s breadcrumb markup |
Adds correct Breadcrumb Schema so Google can index hierarchy properly |
|
Product URLs in sitemaps don’t reflect collection structure |
Detects and displays the correct parent and sub-collection automatically |
|
No support for multi-level collections |
Supports parent > child collection hierarchies |
|
Inconsistent user navigation experience |
Provides a clear, stable breadcrumb trail on all product and collection pages |
Two Phases of Risify Breadcrumb Setup
The breadcrumb setup in Risify has two phases :
- Phase 1: You’ll configure breadcrumbs in Shopify Admin. In this phase, you decide how each breadcrumb path should appear for collections and products.
- Phase 2: You’ll add and style the breadcrumb section in your storefront theme (Theme Customization).
This makes the breadcrumbs visible on your live store.
If you finish Phase 1 and don’t see any breadcrumbs yet, don’t worry. They will appear after completing Phase 2.
Phase 1: Configure Breadcrumbs in Admin
In this phase, you define the breadcrumb paths directly inside your Shopify admin. Start with Collections, then move to Products if needed.
Step 1: Open the Navigation Tab
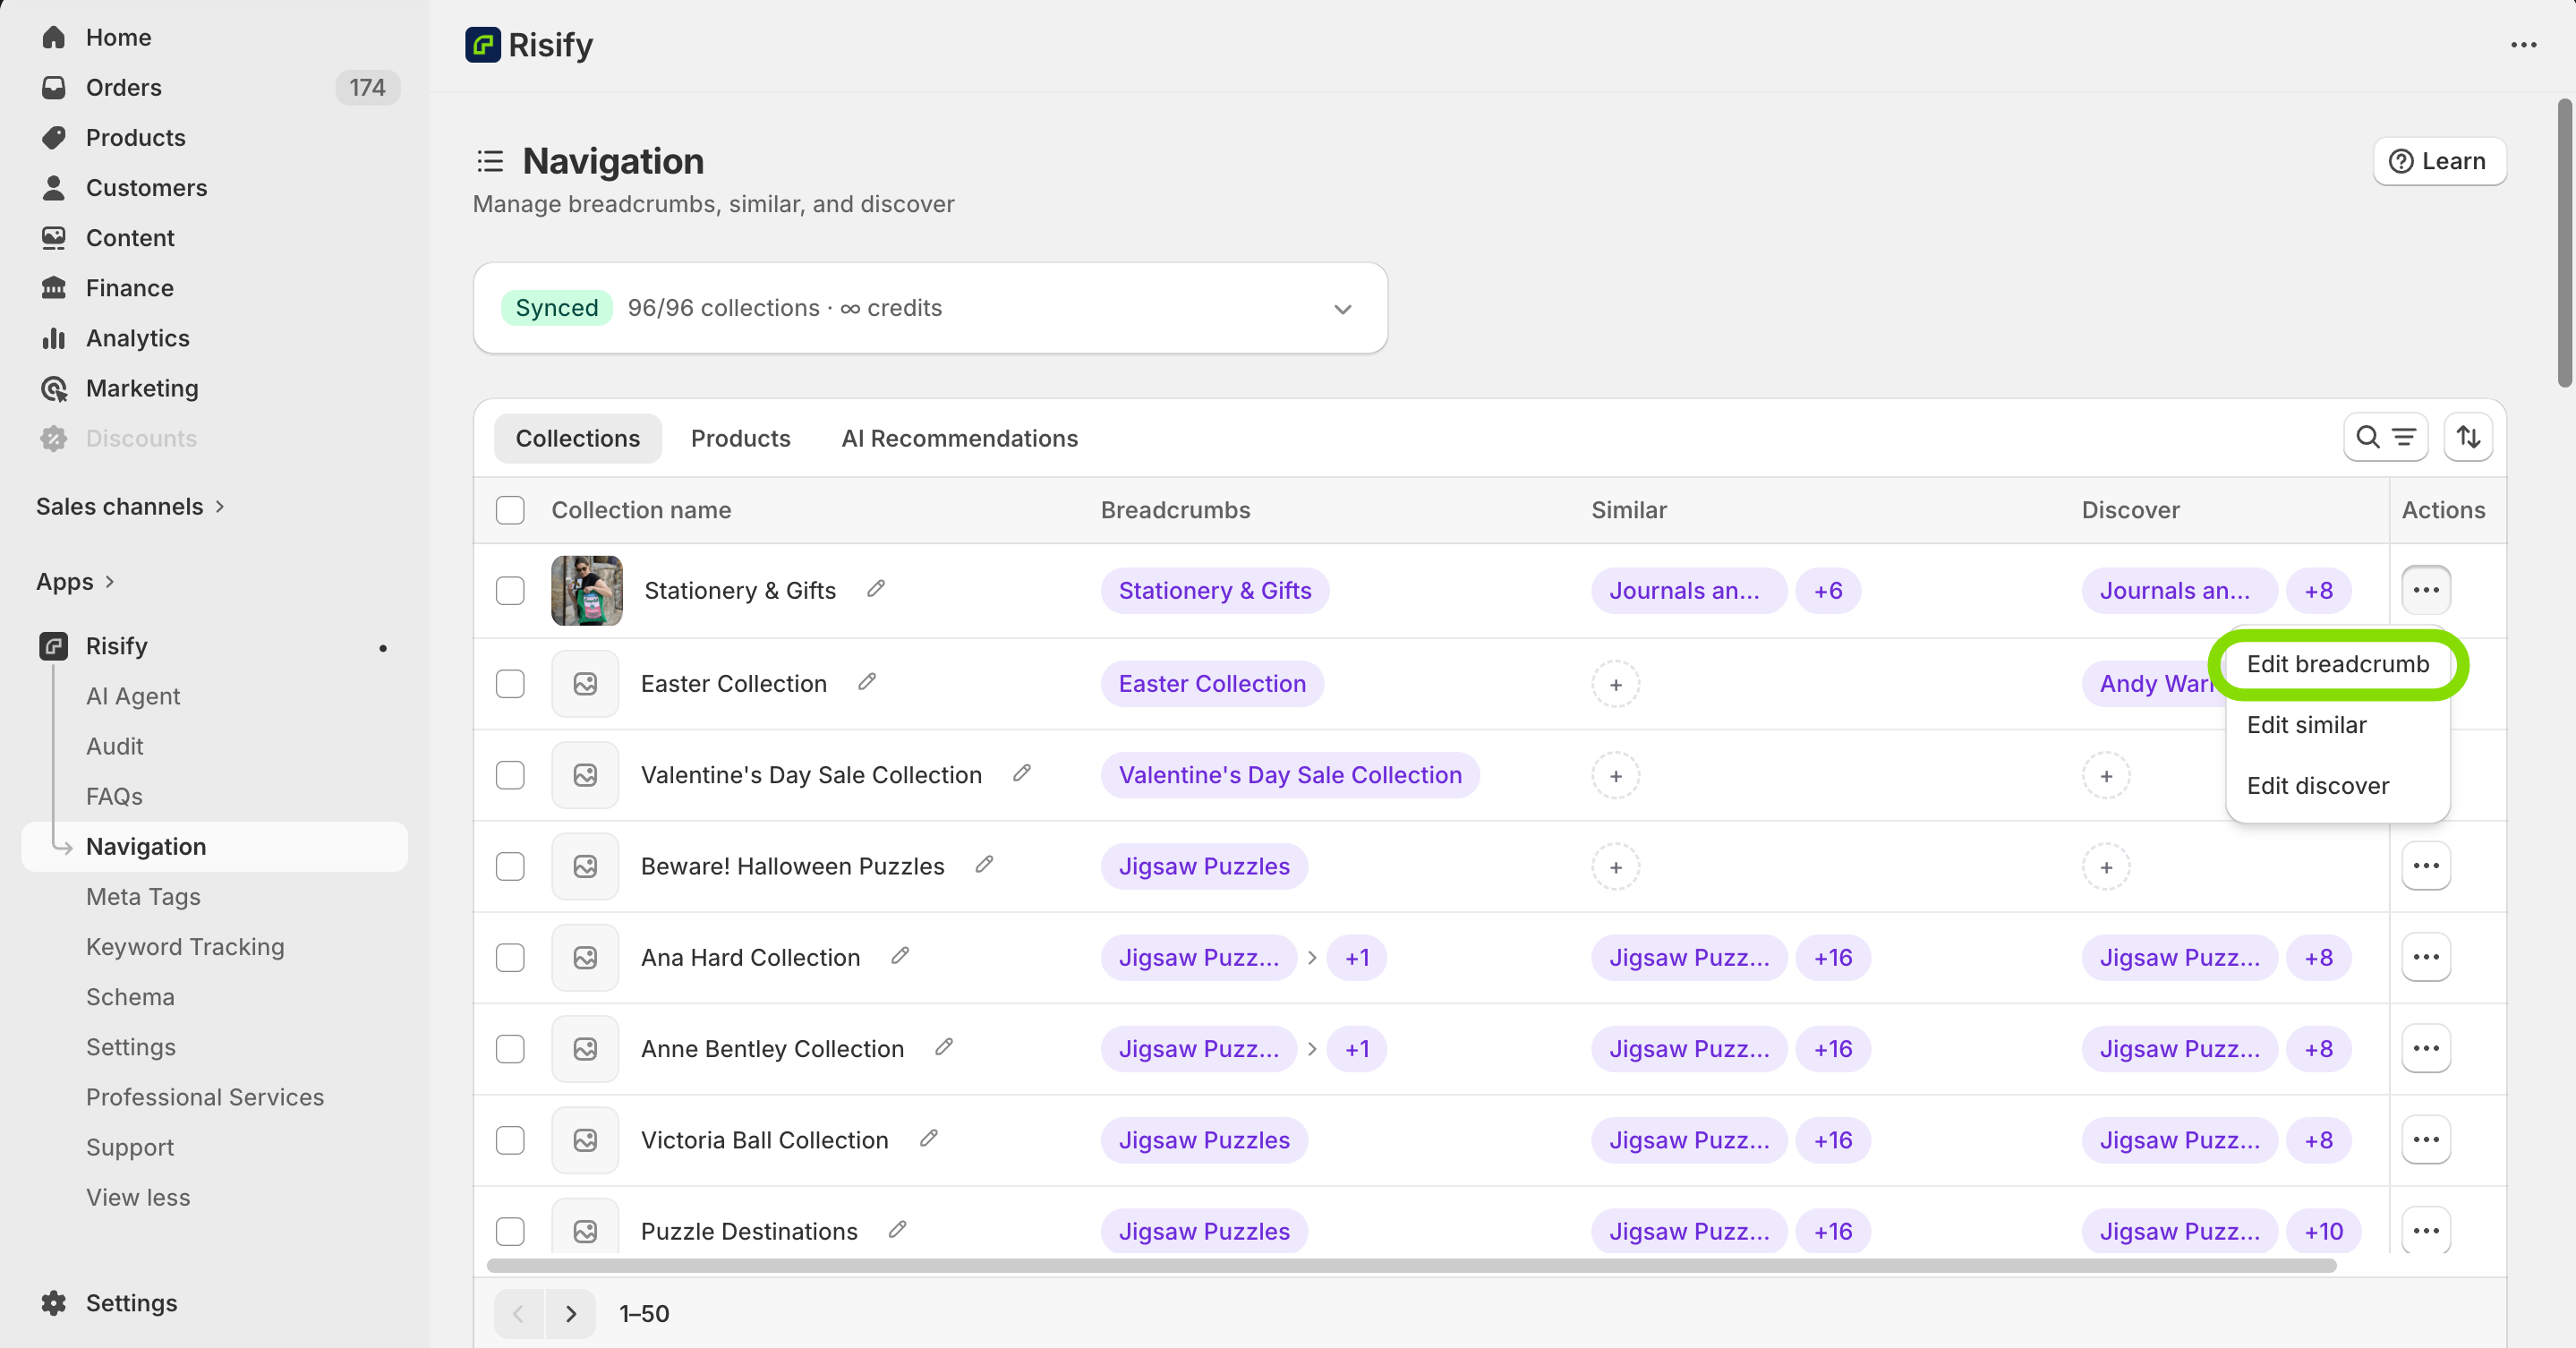
In your Shopify admin, go to Apps, open Risify, and click Navigation. Select the Collections or Products tab depending on which pages you want to configure.

Step 2: Edit a Breadcrumb Path
Find the collection or product you want to edit. In the Actions column, click the three-dot menu and select Edit Breadcrumb.
A popup will open where you can build the breadcrumb path:In the Search in Label field, type and add the items that should appear in the path.
For example: Home Page, Living Room, Sofa Sets. Drag and drop items in the Breadcrumb Collections Order section to rearrange them. Use the X icon to remove any item.

Step 3: Review and Save
Check the Preview at the top of the popup to confirm the correct order. Click Save.
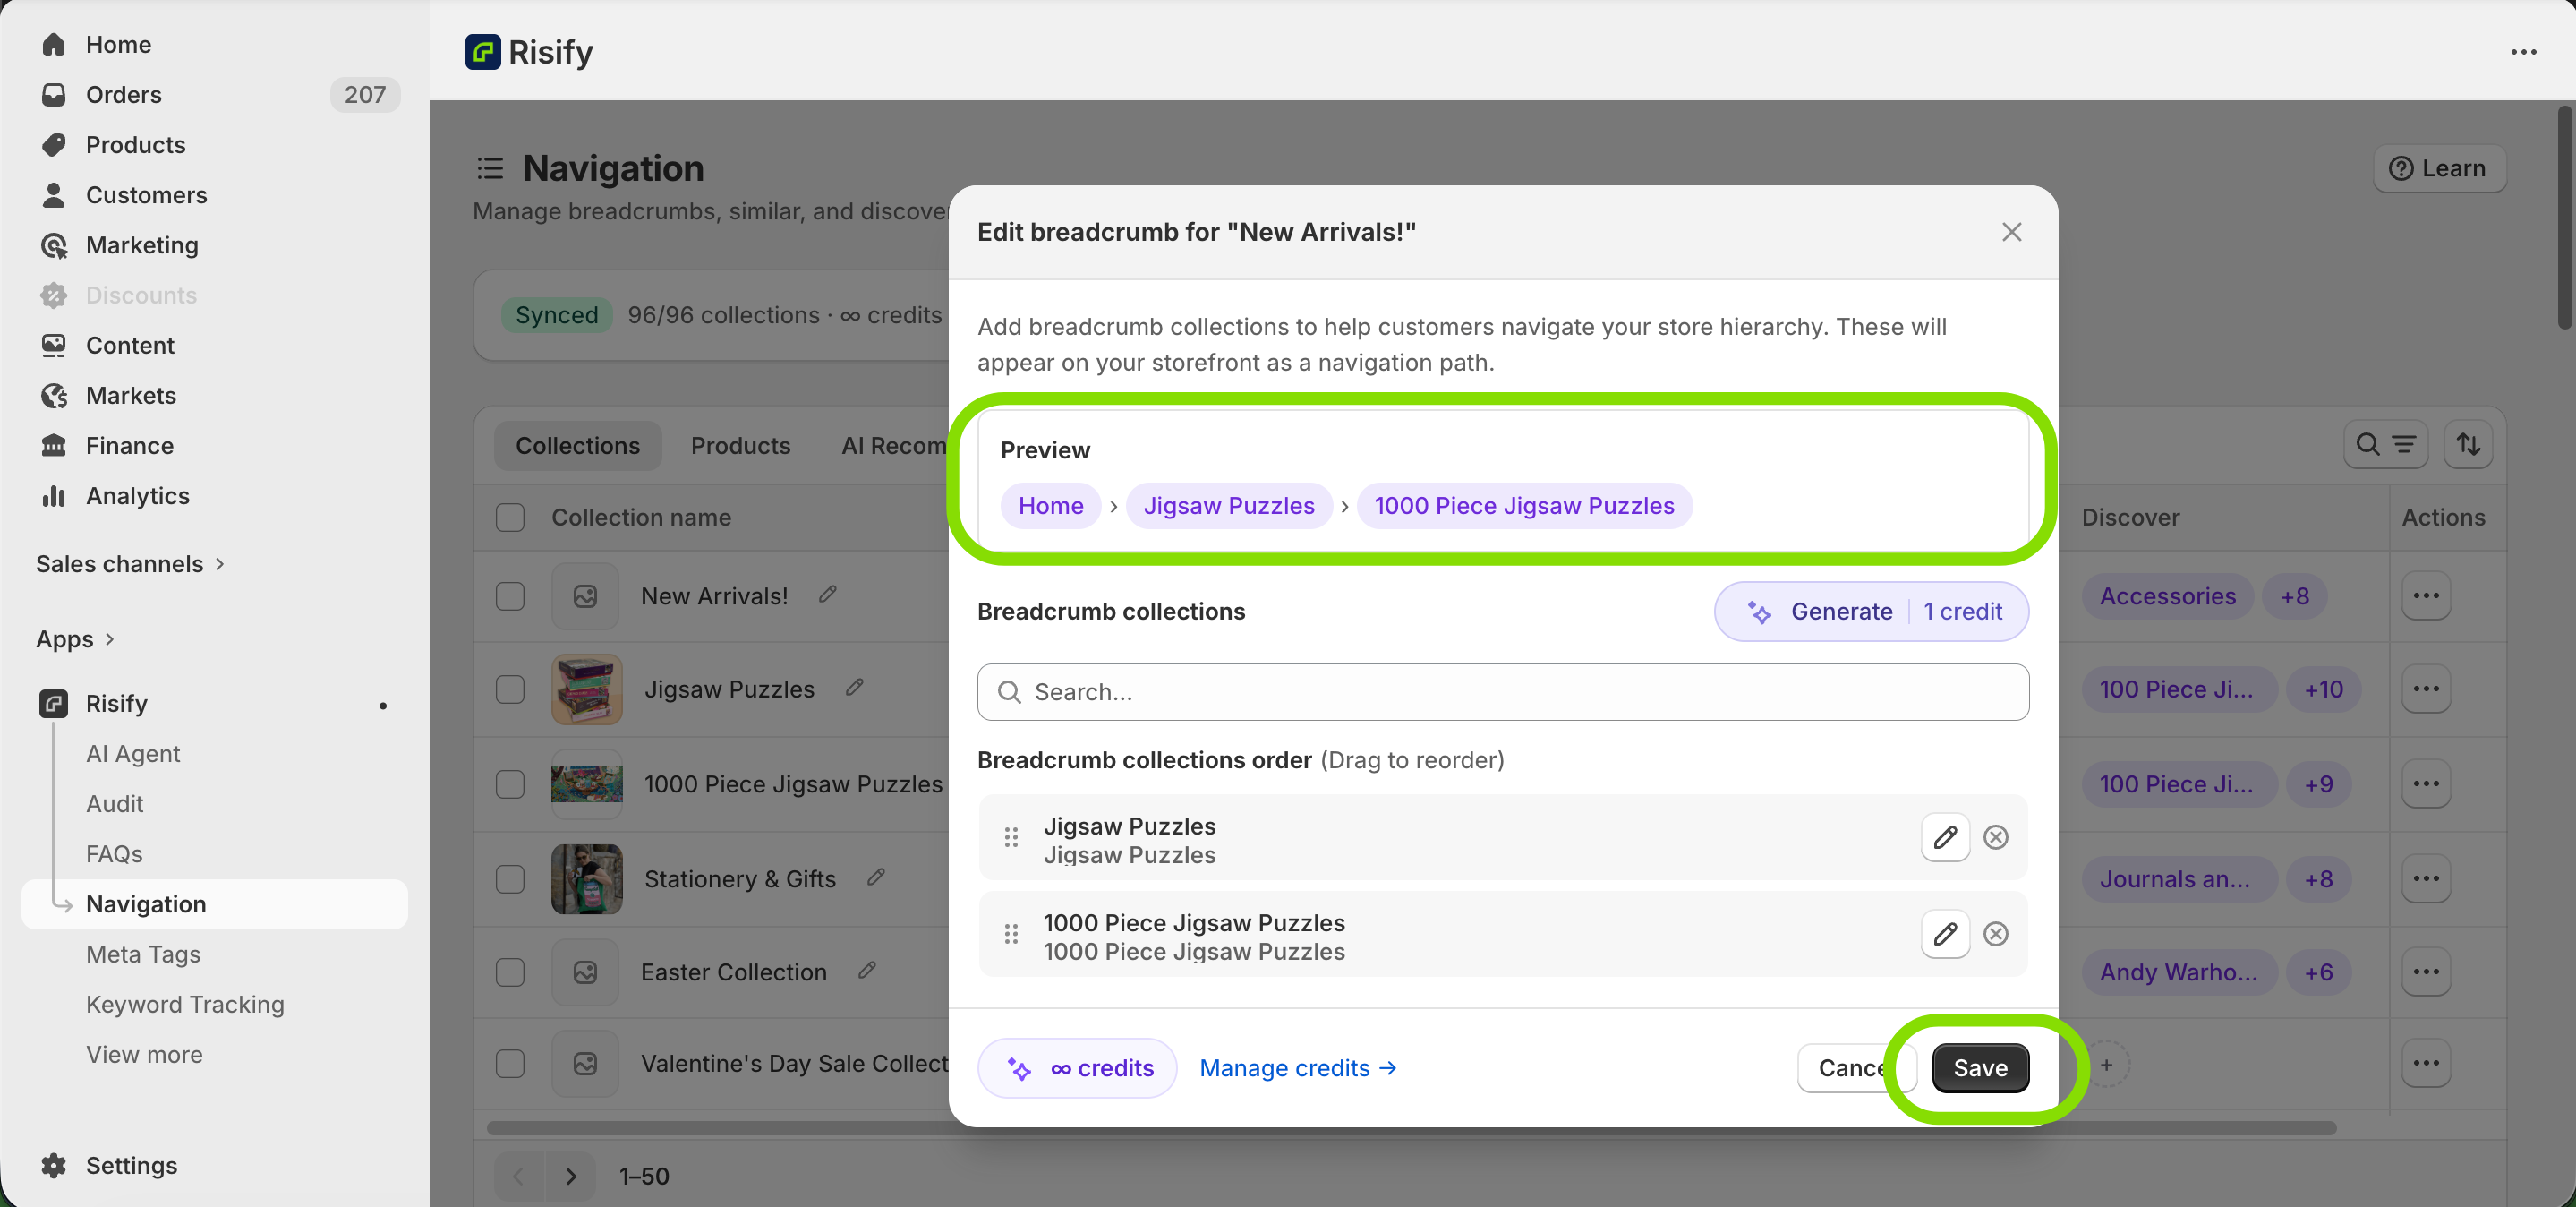
Tip: You can also use Risify’s AI Generator to create breadcrumb paths automatically. Click the Generate button in this section to use 1 AI credit per item.
Tips for Organizing Breadcrumbs
- Keep breadcrumb paths short and consistent. Two or three levels are usually ideal.
- Use the main collection that best represents each product.
- If you rename or reorganize collections, revisit your breadcrumbs to keep them accurate.
What Happens Next
Your breadcrumb structure is now saved inside Risify’s admin. However, it will not appear on your storefront yet. In Phase 2, you will add the breadcrumb section to your theme and adjust its design.
Phase 2: Add and Customize Breadcrumbs in Your Theme
After configuring your breadcrumbs in Phase 1, you now need to display them on your storefront through Shopify’s Theme Editor.
Step 1: Open the Correct Template in the Theme Editor
In Shopify admin, go to Online Store, find your theme, and click Customize. Switch to the collection or product template where you want breadcrumbs to appear. Then navigate to the specific page where you assigned breadcrumbs in Phase 1.
Step 2: Add the Risify Breadcrumb Section
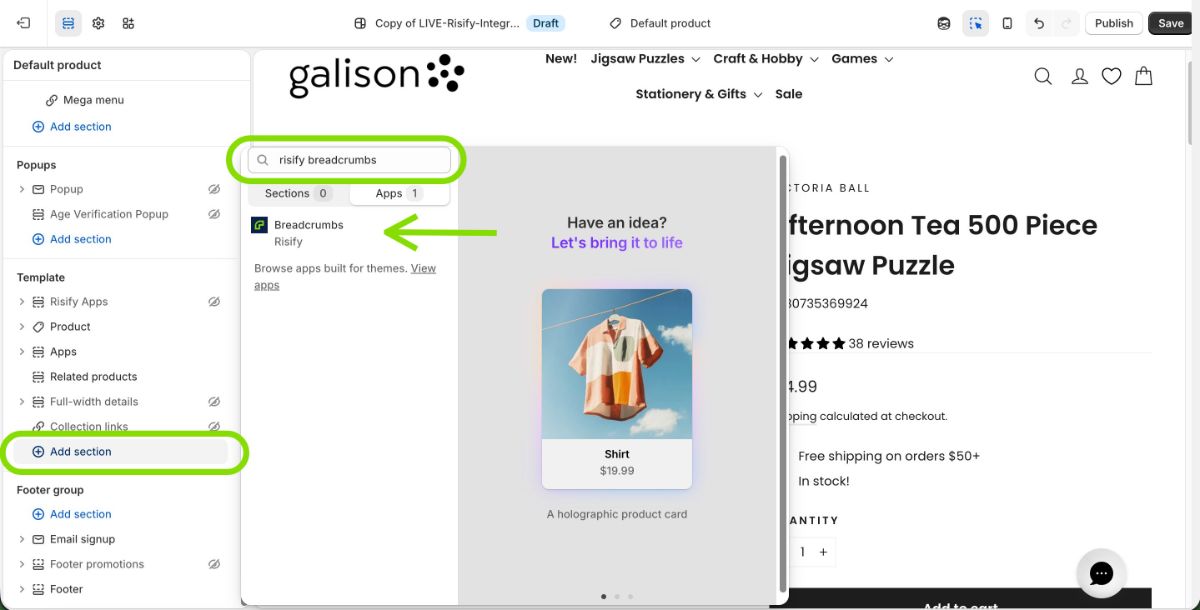
- In the left sidebar under the Template panel, click Add Section.
- Switch to the Apps tab and select Risify Breadcrumbs.
- Drag the section to the top of your template so it appears above all other sections (banners, product grids, etc.).

Step 3: Customize Your Breadcrumbs
Click the Risify Breadcrumb section in the sidebar to open its settings. The following options let you adjust the look and feel.
General
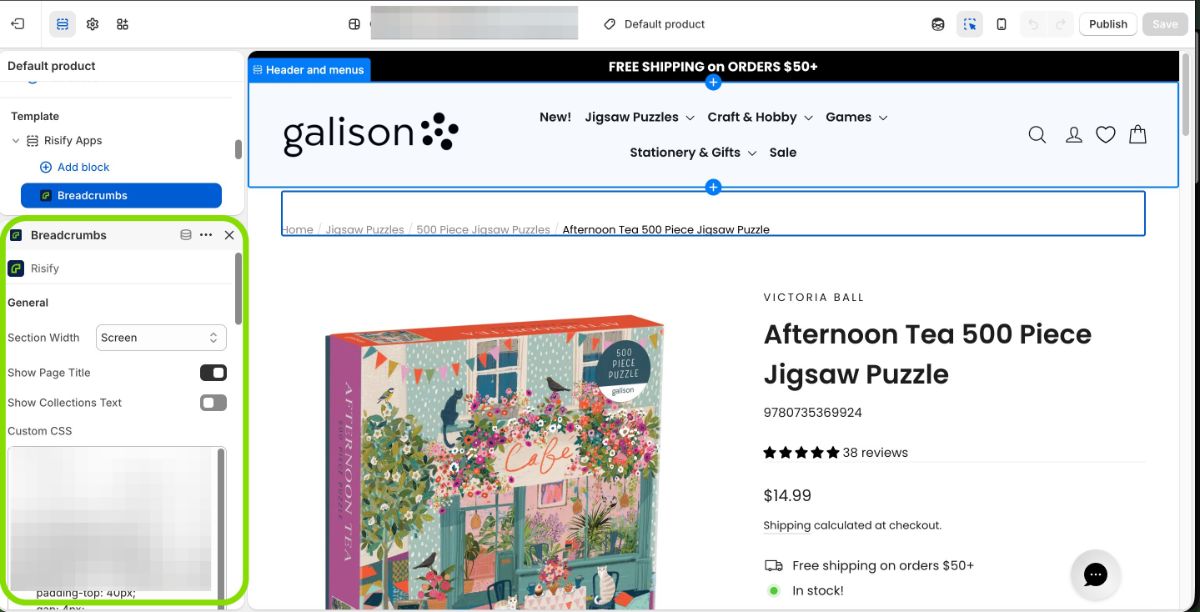
Section Width: Choose whether the breadcrumb matches your theme’s content width (Page), spans the entire screen (Screen), or adapts to its container (Flex).
- Show Page Title: Enables or hides the current page title next to the breadcrumb path.
- Show Collections Text: Displays a label like “Collections” before the path for extra context.
Home Link

- Display Type: Choose None (hidden), Icon (home symbol), or Text (the word “Home”).
- Style: Select from predesigned home icon styles.
- Custom Icon: Upload your own icon image for a unique design.
Divider
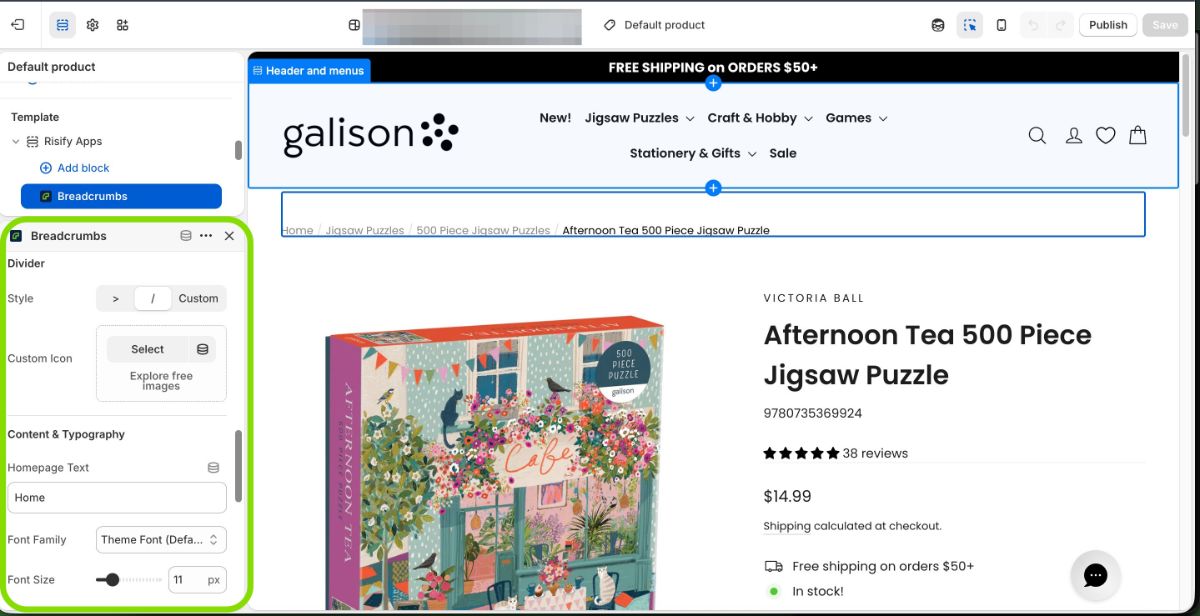
- Style: Choose the separator symbol between breadcrumb levels, such as “>” or “/”.
- Custom Icon: Upload your own divider graphic if needed.
Content and Typography
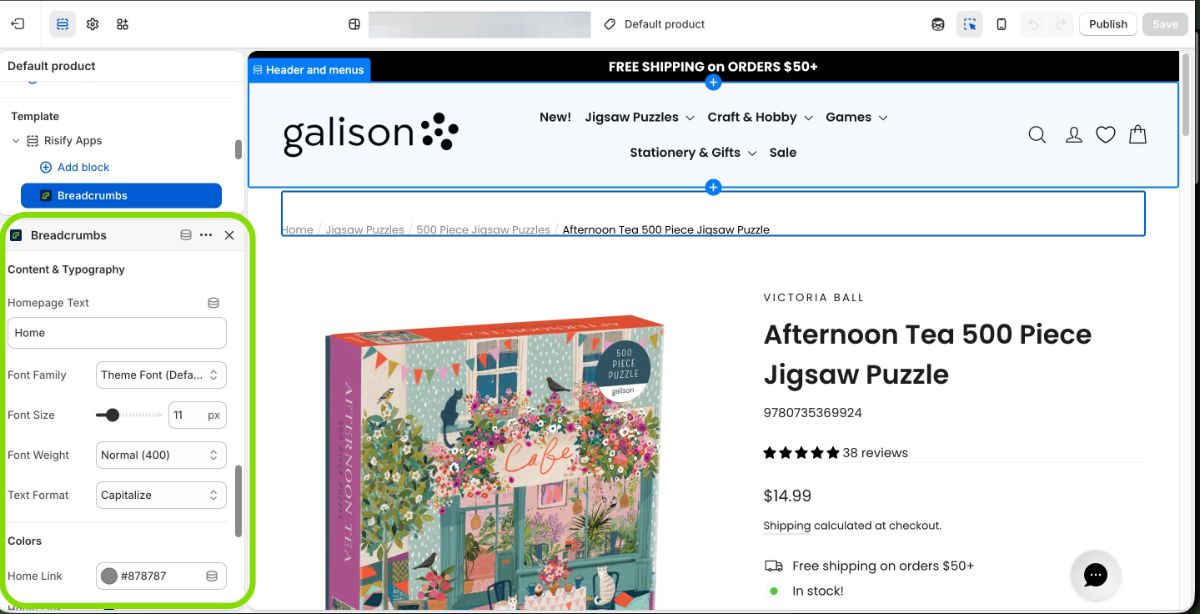
- Homepage Text: Change the displayed text for your home link (e.g., “Home” or “Main”).
- Font Family: Select your theme’s font or choose another typeface.
- Font Size: Adjust the breadcrumb text size in pixels.
- Font Weight: Set how bold the text appears (e.g., Medium 500, Bold 700).
- Text Format: Choose Capitalize, Uppercase, or Lowercase.
Colors
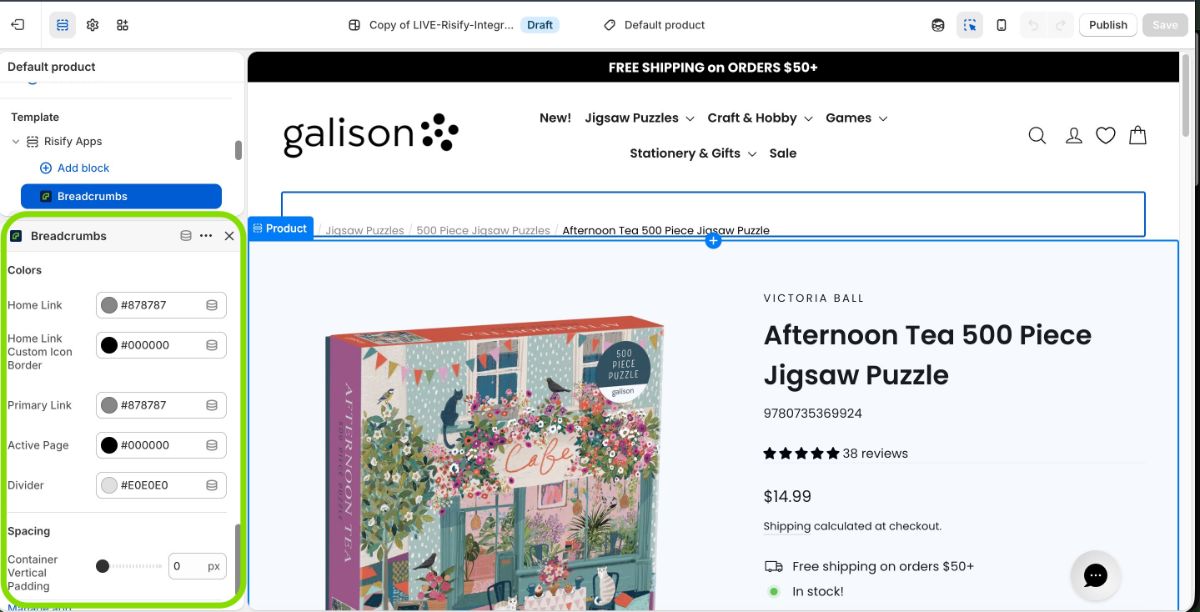
- Home Link: Color of the home icon or text.
- Primary Link: Color for intermediate breadcrumb links.
- Active Page: Color of the final (current) page in the trail.
- Divider: Color for the separator symbol.
Spacing
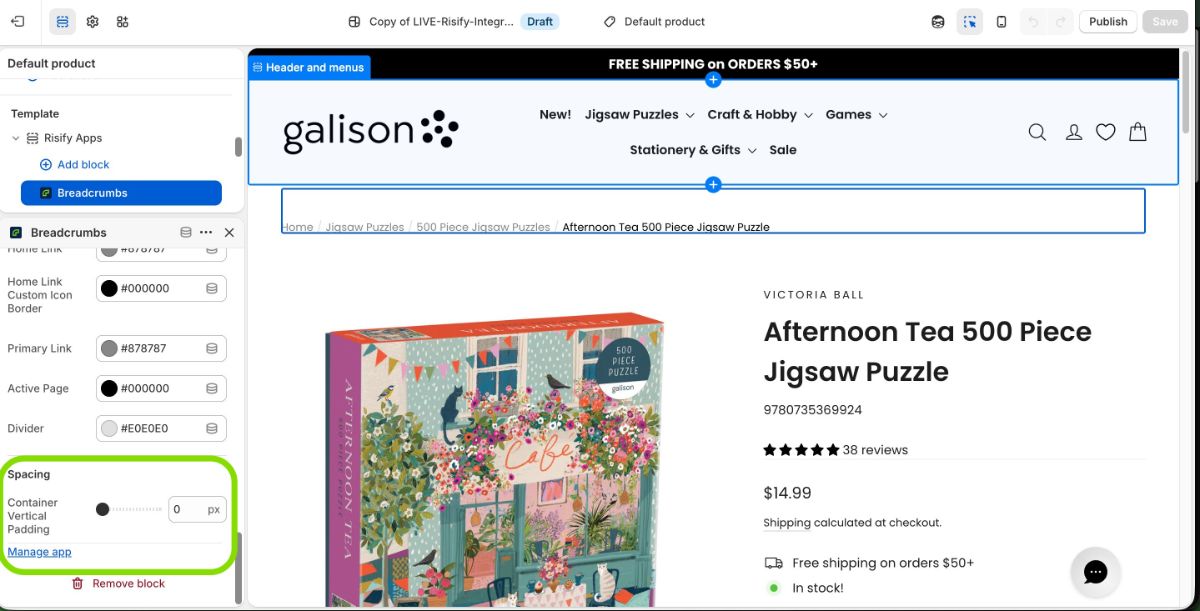
- Container Vertical Padding: Controls how much space appears above and below the breadcrumb section.
Step 4: Review and Save
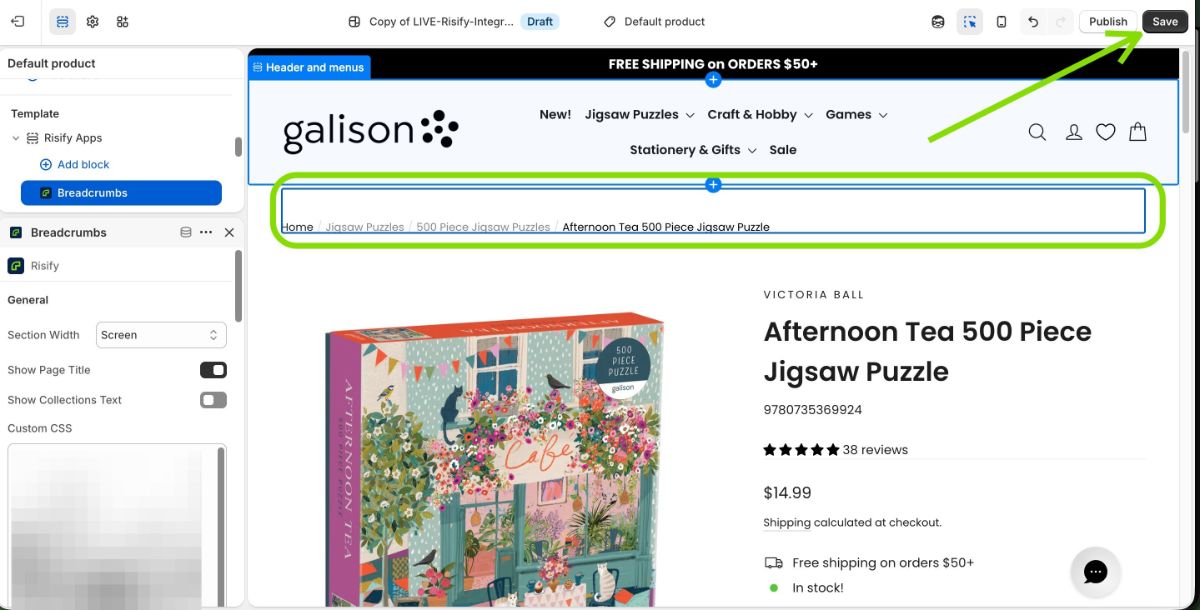
Use the preview panel to confirm that your breadcrumb path, spacing, and style look correct. When everything is set, click Save in the top-right corner of the theme editor.
Then visit your live store and refresh the page to confirm the breadcrumbs display as expected.
Summary
By completing both phases, you set up a complete breadcrumb system for your Shopify store:
- Phase 1 defines your breadcrumb paths inside Risify’s admin panel.
- Phase 2 adds and styles those breadcrumbs visually inside your Shopify theme.
Together, these steps ensure that your breadcrumb structure is both SEO-friendly and visually integrated with your store’s design.
Why You Need Risify Breadcrumbs
Shopify’s native breadcrumb system only works when a visitor arrives through a collection URL. If someone visits a product directly from Google or another link, the breadcrumb disappears and Google cannot read it properly.
Risify lets you define consistent breadcrumb paths for both collection and product pages, regardless of how users reach them.
This means your store’s hierarchy is always visible to customers and Google correctly understands your site structure.