You just installed Risify. This guide walks you through the recommended setup order so your store starts sending the right signals to search engines and AI tools from day one.
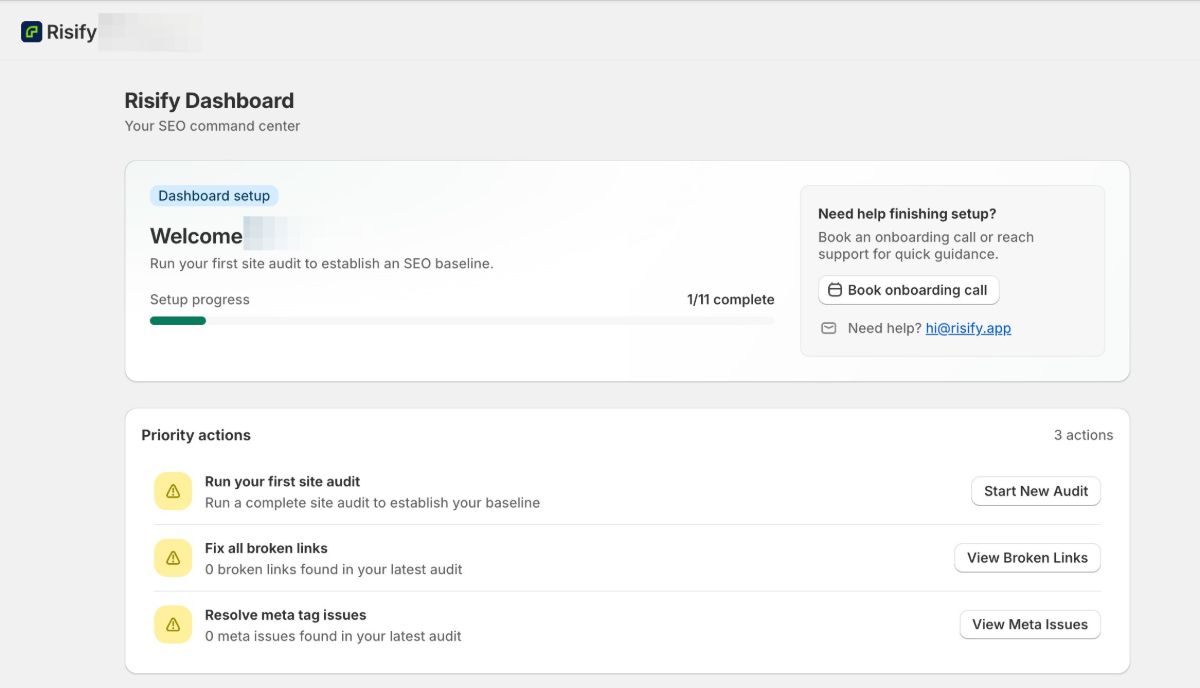
The order below is intentional. Schema comes first because it tells search engines what your store is. The audit comes next so you know what needs fixing. Navigation and FAQs come after because they build on the structure schema creates. Everything else follows naturally.
Step 1: Enable and Configure Schema
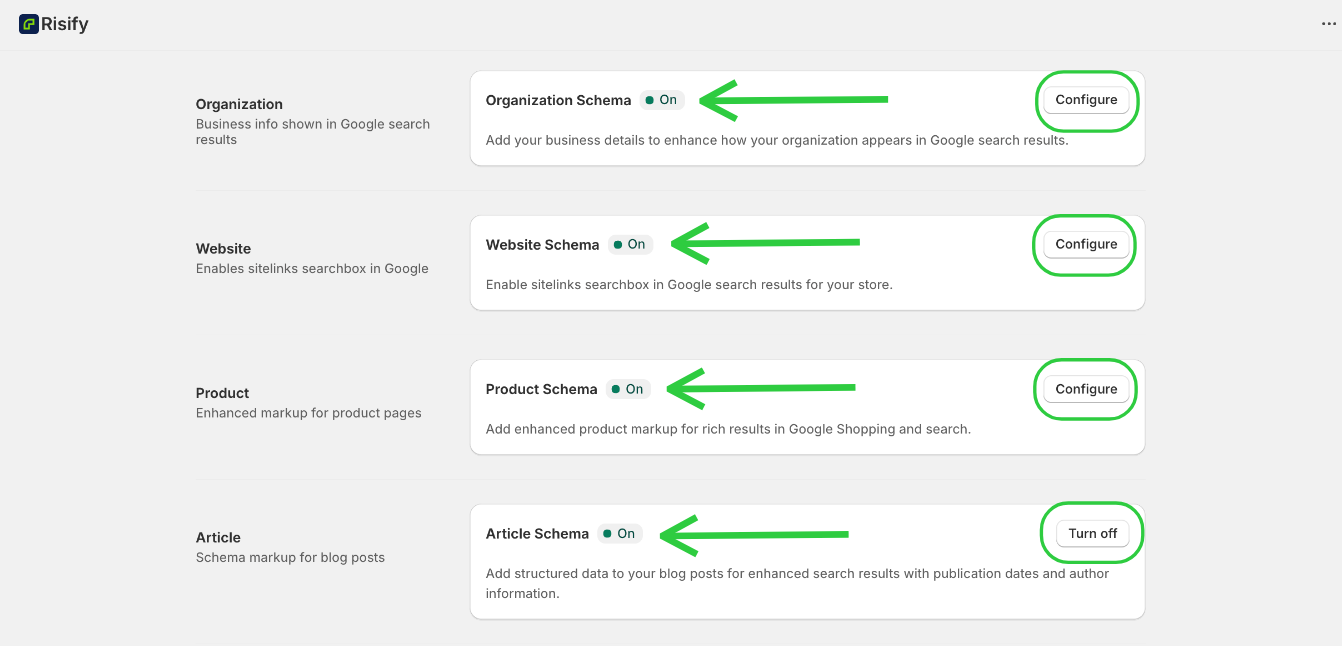
Schema is the foundation. It tells Google, Bing, and AI tools exactly what your store sells, who you are, and how your pages are structured. Without it, search engines are guessing.
Go to Apps → Risify → Schema (JSON-LD). Turn on the schema types that apply to your store. For most stores, that means Organization, Website, Product, Article, Breadcrumb, and FAQ.
Fill in the required fields for each type. Organization Schema needs your business name, logo URL, and contact details. Product Schema pulls from your existing Shopify data. FAQ Schema activates automatically once you start using Risify’s FAQ feature.
Then add the Schema (JSON-LD) block to your Shopify theme. Go to Online Store → Themes → Customize, and add the block to your main layout so it appears across all pages. Save and publish.
Why first: Schema is a one-time configuration. Once it’s set, it works automatically across your entire store. Every other feature you set up after this will benefit from having schema already in place.
Want the full walkthrough? See our complete guide on how to set up Schema (JSON-LD) in Risify.
Step 2: Run Your First Store Audit
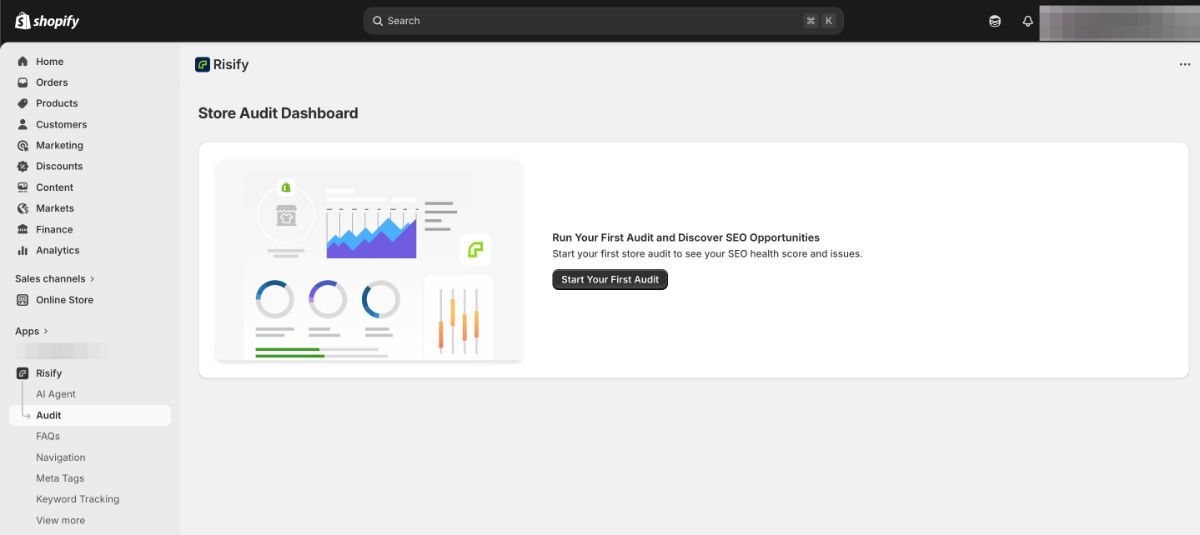
Now that the schema is active, run an audit to see where your store stands.
Go to Apps → Risify → Store Audit and click Start Your First Audit. Risify will scan your store for broken links, meta tag issues, and page speed problems, then generate a Health Score.
Do not try to fix everything right away. The audit gives you a baseline. Review the results, note the high-severity issues, and come back to them after you finish the rest of this setup.
Why second: The audit shows you the current state of your store’s SEO. Knowing your starting point helps you measure the impact of everything you set up next.
For a detailed breakdown of each audit category , check out our full guide on how to use the Store Audit in Risify.
Step 3: Set Up Navigation (Breadcrumbs, Similar, Discover)
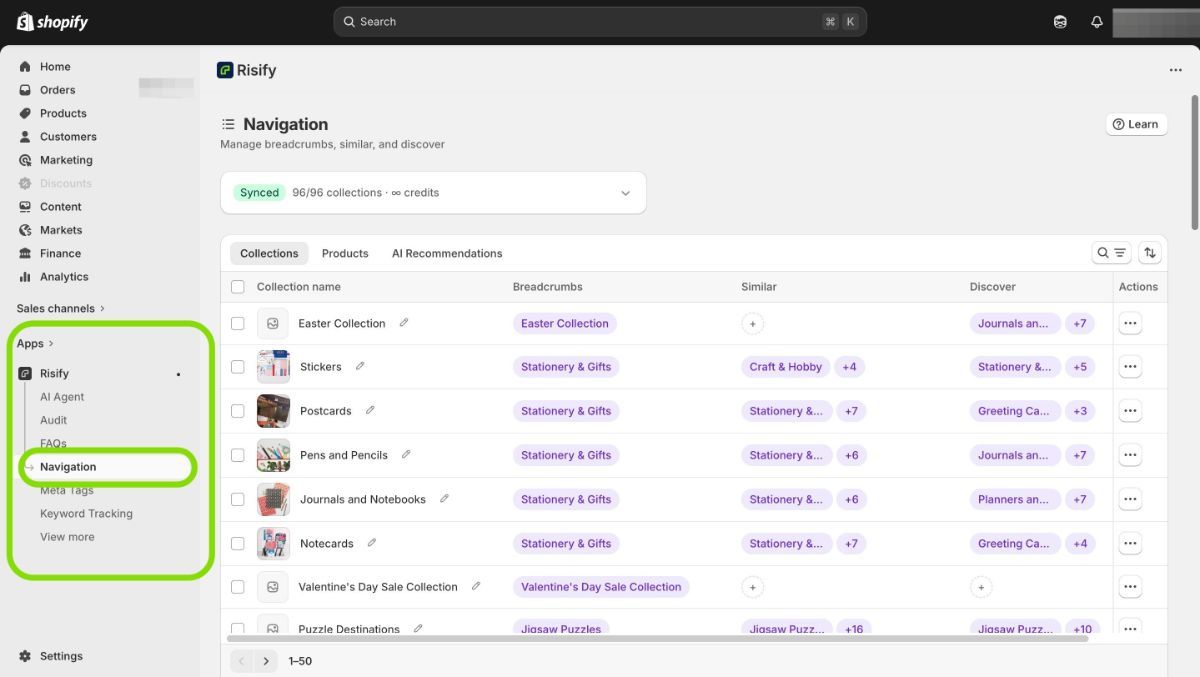
Navigation is where you define how your store’s pages relate to each other. Go to Apps → Risify → Navigation.
Start with Breadcrumbs. For your most important collections and products, edit the breadcrumb path to define the correct hierarchy (e.g., Home → Living Room → Sofa Sets). Then add the Risify Breadcrumbs section to your collection and product templates in the Theme Editor.
Next, set up Similar for your collections. This adds a navigation bar showing related collections on each collection page. Then add Discover suggestions to guide shoppers toward related products or categories.
For each feature, remember the two-phase pattern: configure in Risify’s admin (Phase 1), then add the section to your theme (Phase 2).
Why third: Navigation builds on schema. Breadcrumbs create hierarchy that Breadcrumb Schema communicates to Google. Similar and Discover create the internal linking structure that helps both shoppers and AI tools understand your catalog.
If you are looking to explore the Risify navigation further, each feature has its own setup guide with detailed instructions: Breadcrumbs , Similar , and Discover.
Step 4: Create and Assign FAQs
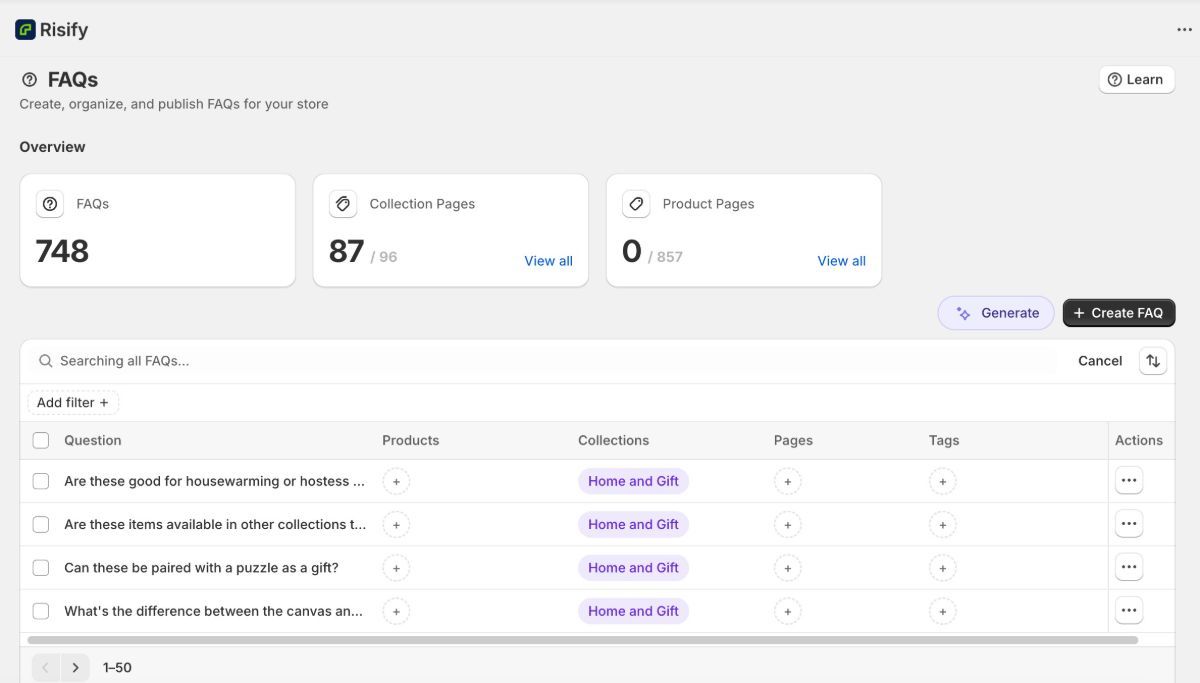
Go to Apps → Risify → FAQs. Activate the feature, then start creating questions and answers for your most important products and collections.
Assign each FAQ to the relevant pages, then add the Risify FAQ section to your product and collection templates in the Theme Editor.
FAQs with proper schema give AI tools direct question-and-answer pairs to cite. Start with your top-selling products and most-visited collections.
Why fourth: FAQ Schema is one of the strongest signals for AI visibility. Once your store structure is in place (schema + navigation), FAQs add the content layer that AI tools reference when answering shopper questions.
For step-by-step instructions including theme customization, see our full guide on how to set up FAQs in Risify.
Step 5: Add Keywords to Track
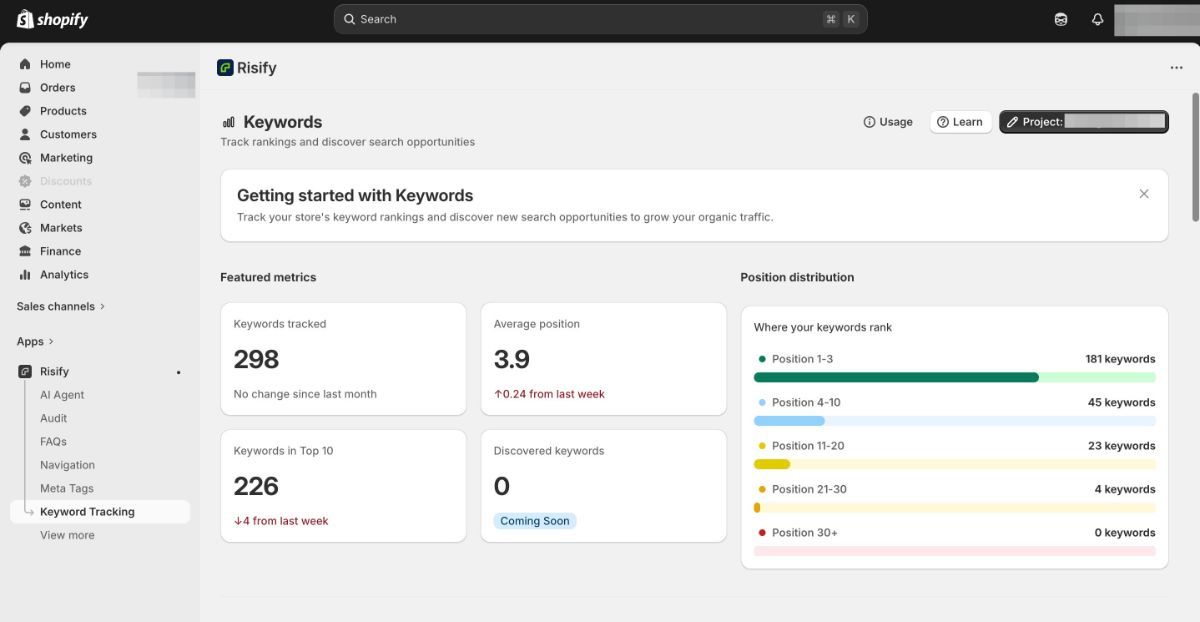
Go to Apps → Risify → Keyword Tracking. Create a project with your domain, target country, language, and device type. Then add the keywords you want to monitor.
Start with your brand name, your top product categories, and a few long-tail keywords that match how shoppers search for your products.
Why fifth: Keyword tracking shows you the results of your work. Once schema, navigation, and FAQs are in place, tracking helps you measure whether your rankings improve over time.
Need help choosing keywords or understanding the metrics? See our full guide on how to use Keyword Tracking in Risify.
Step 6: Fix Audit Issues
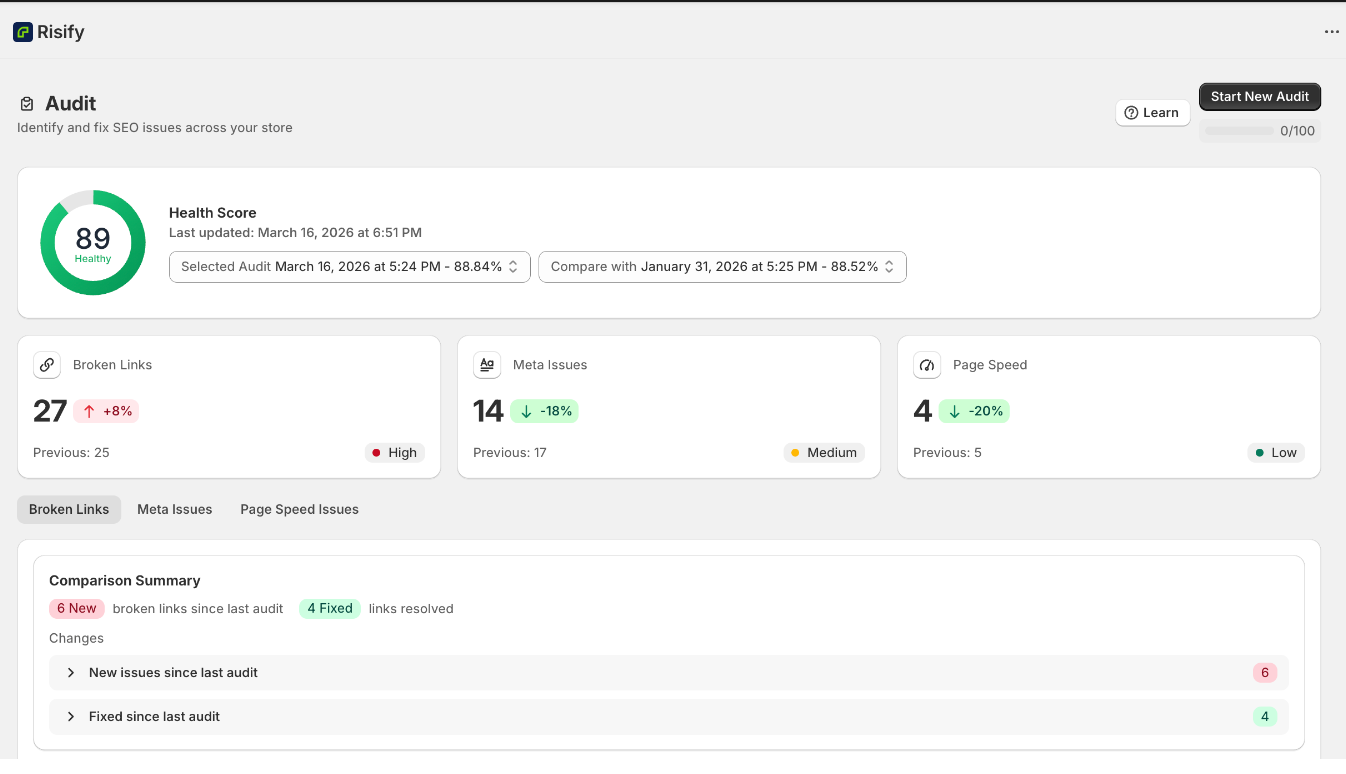
Now go back to your Store Audit results from Step 2. Start with the high-severity issues:
- Broken links: Set up 301 redirects in Shopify (Online Store → Navigation → URL Redirects) or fix the links at the source.
- Meta tag issues: Go to Risify’s Meta Tags section to edit titles and descriptions for products and collections that have missing or poorly optimized metadata.
- Page speed: Review the speed metrics and address the biggest issues first, typically image optimization and unused apps.
Run a new audit after making fixes to update your Health Score and track progress.
For bulk editing tips and AI-generated suggestions, see our full guide on how to edit Meta Tags in Risify.
What Comes Next
Once the core setup is complete, these are ongoing tasks to keep your store optimized:
- Run store audits regularly (monthly is a good cadence) to catch new issues early.
- Add breadcrumbs, Similar, and Discover to new collections and products as your catalog grows.
- Create FAQs for new products and seasonal collections.
- Review keyword rankings to track progress and spot opportunities.
- Keep meta tags updated as you add or change products.
The initial setup builds the foundation. Ongoing maintenance keeps it strong.
Conclusion: Your Guide To Risify App
The recommended setup order is: Schema → Audit → Navigation → FAQs → Keyword Tracking → Fix Issues. Each step builds on the previous one, starting with how search engines understand your store (schema) and ending with how you measure and improve over time (tracking and audit fixes).
The time this takes depends on your store’s size. A small catalog can be set up in an afternoon. Larger stores with hundreds of products and collections will take longer, especially for breadcrumbs and FAQ creation, but the structure is the same regardless of size.